Entra ID (Azure AD) OIDC Configuration Guide
TIP
Self-hosted customers: If you deployed GraphnAI using a deployment bundle, you do not need this guide. The Setup Wizard configures Entra ID automatically at first boot. See the Quick Start Guide instead.
This guide is for manual OIDC configuration — useful for development environments, custom deployments, or replacing an existing app registration.
This guide walks through the process of manually configuring Microsoft Entra ID as the identity provider for GraphnAI Platform.
Prerequisites
- A Microsoft Entra ID tenant with Global Administrator or Application Administrator role
- Access to the Entra admin center
- The URL where GraphnAI Platform will be hosted (e.g.,
https://graphnai.yourcompany.com)
Step 1: Register the Application
- Navigate to Entra admin center > Identity > Applications > App registrations
- Click New registration
- Fill in the details:
- Name:
GraphnAI Platform(or your preferred name) - Supported account types: "Accounts in this organizational directory only" (Single tenant)
- Redirect URI:
- Platform: Web
- URI:
https://graphnai.yourcompany.com/v1/auth/callback(adjust for your deployment URL)
- Name:
- Click Register
IMPORTANT
Note the Application (client) ID and Directory (tenant) ID from the overview page — you'll need these for GraphnAI configuration.
Step 2: Configure Client Authentication
You have two options for client authentication. Certificate-based auth is recommended for production.
Option A: Client Secret (Development)
- Go to Certificates & secrets > Client secrets
- Click New client secret
- Set a description and expiration period
- Copy the Value immediately (it won't be shown again)
Option B: Client Certificate (Production/Recommended)
- Generate an RSA key pair and self-signed certificate:bash
openssl req -x509 -nodes -days 365 -newkey rsa:2048 \ -keyout graphnai-client.key \ -out graphnai-client.crt \ -subj "/CN=GraphnAI Platform" - Go to Certificates & secrets > Certificates
- Click Upload certificate and upload
graphnai-client.crt - Note the Thumbprint displayed after upload
Step 3: Add Graph API Permissions
These permissions enable GraphnAI to search your directory for users and groups when configuring access control.
- Go to API permissions > Add a permission > Microsoft Graph > Application permissions
- Add the following permissions:
| Permission | Purpose |
|---|---|
User.Read.All | Search for users when adding authorizations |
Group.Read.All | Search for groups when adding authorizations |
GroupMember.Read.All | Resolve group memberships at login time |
- Click Grant admin consent for [your tenant]
NOTE
If you skip this step, GraphnAI will detect the missing permissions when an admin first tries to search the directory, and display a banner with a direct link to this page and step-by-step instructions.
Step 4: Configure GraphnAI
Set the following values in your deployment configuration:
Required Settings
| Setting | Description | Example |
|---|---|---|
| OIDC Issuer URL | Your Entra ID issuer endpoint | https://login.microsoftonline.com/{tenant-id}/v2.0 |
| Entra ID Client ID | Application (client) ID from the App Registration | 9e5d0323-e788-49a2-8846-8c7752caebff |
| OIDC Redirect URL | Callback URL (must match App Registration) | https://graphnai.yourcompany.com/v1/auth/callback |
| JWT Secret | Secret key for signing session JWTs | Any secure random string (32+ characters) |
| Frontend URL | Base URL of the frontend | http://graphnai.yourcompany.com |
GRAPHNAI_SEED_ADMIN_EMAIL | Email of the first admin user | [email protected] |
Client Secret Auth
| Setting | Description |
|---|---|
| OIDC Client Secret | The client secret value |
Client Certificate Auth
| Setting | Description |
|---|---|
| Client Key File | Path to the private key PEM file |
| Client Certificate Thumbprint | Certificate thumbprint (hex, from Azure Portal) |
CAUTION
Never commit secrets to source control. Use secure secret management (e.g., Docker Secrets or mounted files) to provide sensitive values in production.
Step 5: First Login (Seed Admin)
- Start the GraphnAI Platform server
- Open the frontend URL in your browser
- Click Sign in with Microsoft
- Log in with the account matching
GRAPHNAI_SEED_ADMIN_EMAIL - The system will automatically register this account as the first ADMIN
IMPORTANT
The seed admin email must exactly match the email address in Entra ID. This auto-registration only happens once — subsequent admins must be added through the User Management page.
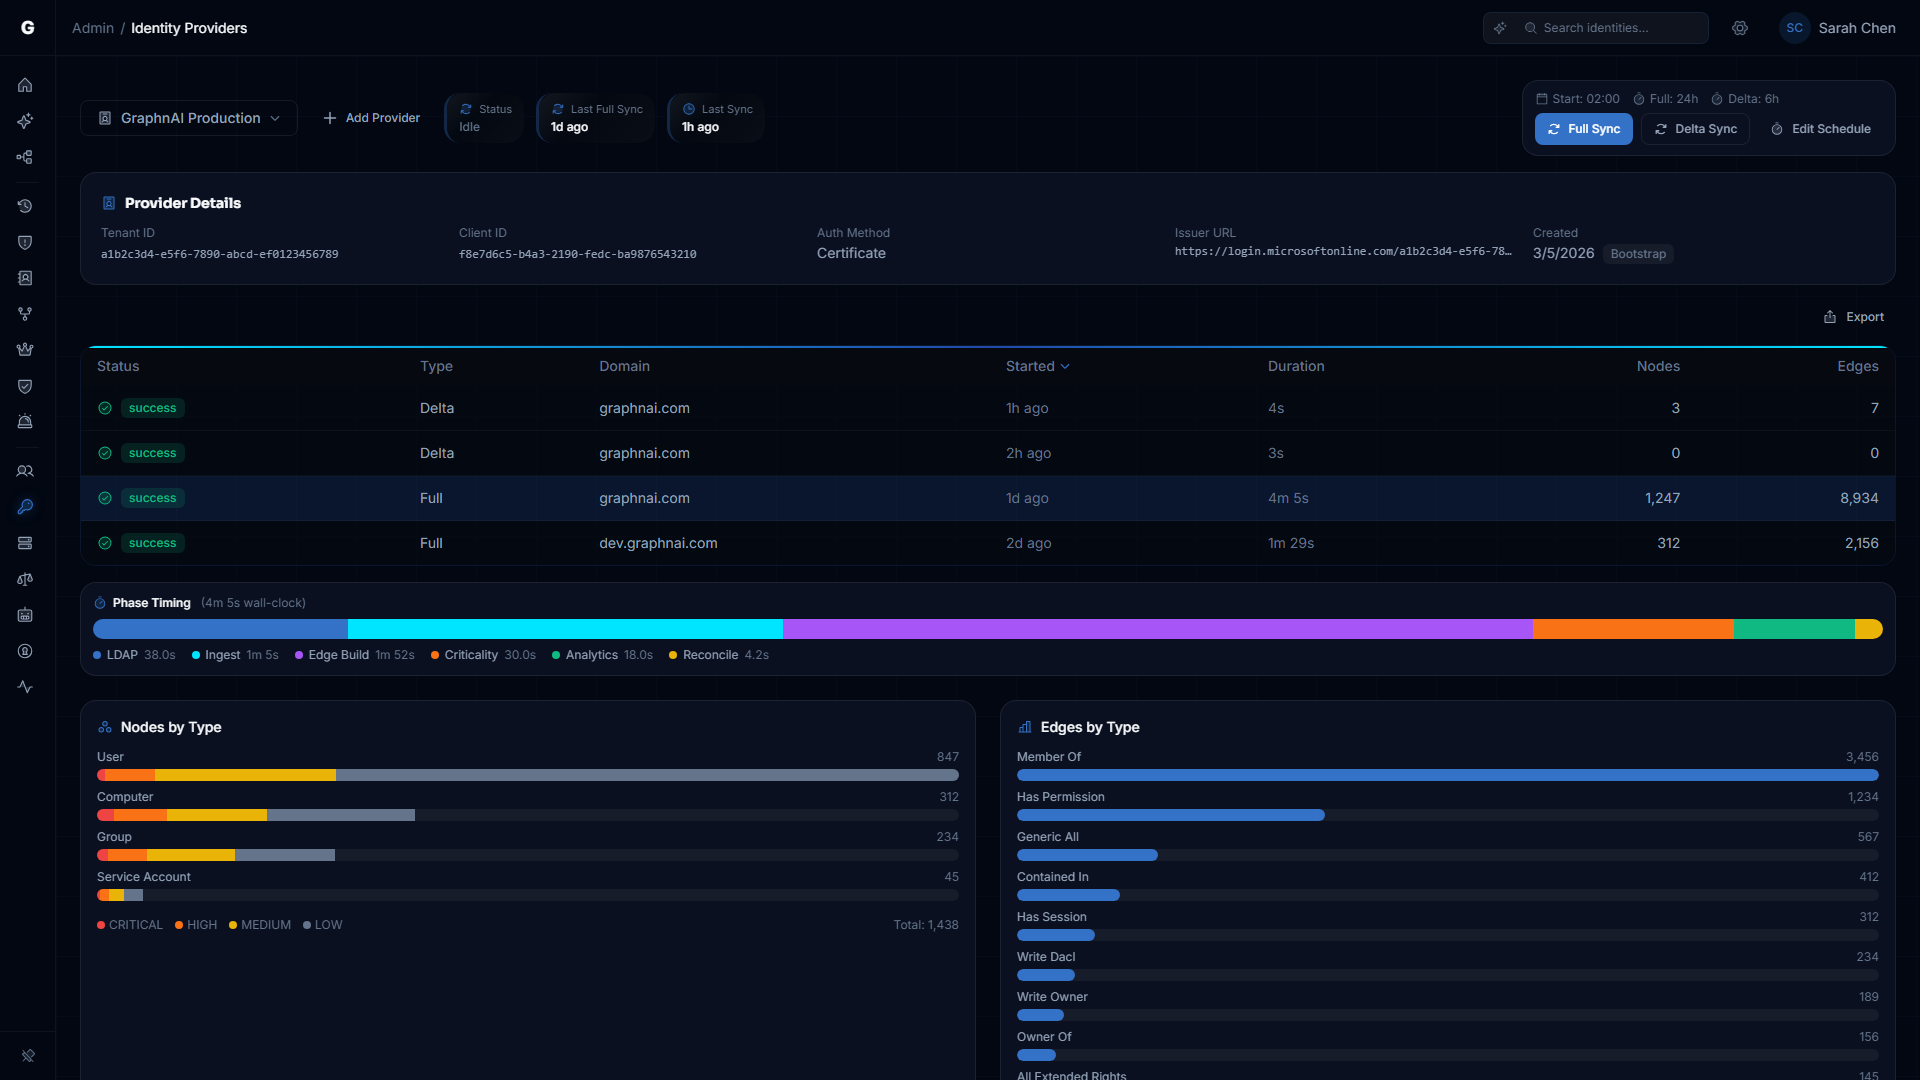
Once configured, your Entra ID tenant appears on the Cloud Identity page where you can view configuration details, trigger syncs, and monitor sync history.
Troubleshooting
"Authentication failed" after login
- Check the server logs for specific error messages
- Verify the redirect URI matches exactly between your configuration and the App Registration
- Ensure admin consent has been granted for Graph API permissions
"email not verified by identity provider"
- This only occurs for guest accounts where Entra ID explicitly marks
email_verifiedasfalse - Managed accounts in your tenant (users created directly in Entra ID) do not include this claim and will work normally
Graph API search returns "permissions required"
- Navigate to the App Registration's API permissions page
- Verify all three application permissions are listed and have green checkmarks indicating admin consent
- If consent was recently granted, the system will automatically refresh its token on the next search attempt